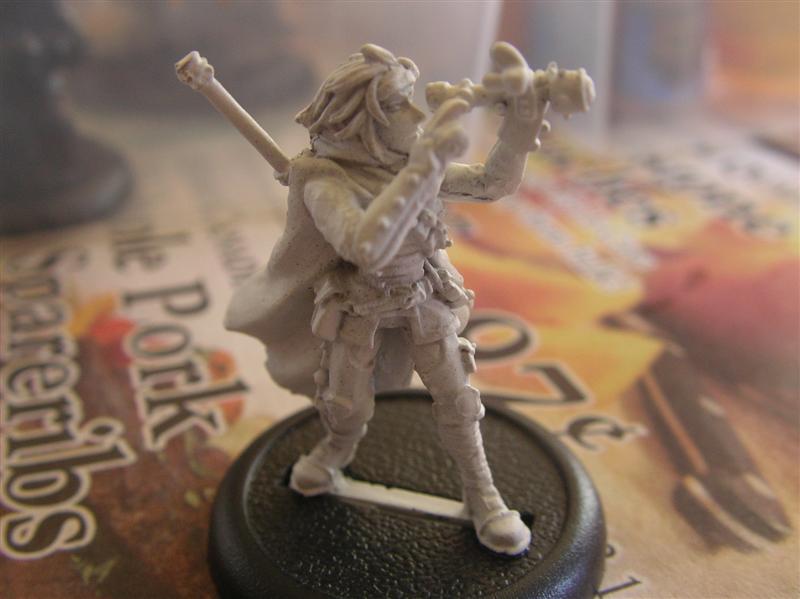
The Minuteman is an excellent jack for light hard-to-hit infantry and medium armored targets. Its high DEF makes it hard to land a blow on it. It is also excellent for Warcaster/Warlock assassination runs against low armor casters. I've used it twice to good effect. Just don't let it get too far away, it needs a focus or two in order to shine.
This model was incredibly easy to put together, no pinning necessary due to the little slots designed in its construction.
The only issue was some of my skin was left behind on its right shoulder and I didn't notice till after I started applying paint. I'm going to blacken it up and call it battle damage.
Tabletop miniatures, role-playing games, boardgames, military history and gaming in Victoria B.C. Canada
Sunday, October 28, 2012
Saturday, October 27, 2012
Arlan Strangeways
Arlan Strangeways is a mechanic extraordinaire. He also has great Jack boosting abilities and a spray that disrupts jacks as well. I've only played one game with him but can see the potential.
Primed Black.
P3 Ironhull Grey, P3 Cygnar Base Blue and Drybrush 50/50 P3 Frostbite and Cygnar Blue Highlight.
Drybrush P3 Cold Steel, GW Dwarf Bronze and P3 Midlund Flesh.
Drybrush GW Elf Flesh, P3 Cygnar Yellow, P3 Bootstrap Leather.
Drybrush Rucksack Tan, P3 Gun Corps Brown, drybrush Bootsrap Leather (again), drybrush P3 Arcane Blue on the gantlet and wrench and a light drybrush of P3 Frostbite over the same.
The some GW Devlan Mud and some gravel and flock. Simple and straightforward model to put together and paint.
Primed Black.
P3 Ironhull Grey, P3 Cygnar Base Blue and Drybrush 50/50 P3 Frostbite and Cygnar Blue Highlight.
Drybrush P3 Cold Steel, GW Dwarf Bronze and P3 Midlund Flesh.
Drybrush GW Elf Flesh, P3 Cygnar Yellow, P3 Bootstrap Leather.
Drybrush Rucksack Tan, P3 Gun Corps Brown, drybrush Bootsrap Leather (again), drybrush P3 Arcane Blue on the gantlet and wrench and a light drybrush of P3 Frostbite over the same.
The some GW Devlan Mud and some gravel and flock. Simple and straightforward model to put together and paint.
Monday, October 22, 2012
Avenger Warjack
The Avenger Warjack is a new kit that was released. It has a powerful sword that has the stun feature as well as a ranged gun with a 4" AOE. If it hits it also causes models in that AOE to get knocked down.
There is difficulty in putting him together. I had to pin his hand, arms and head to the other parts...repeatedly. Just be aware of that before starting to allow enough time to do so.
I've used it twice so far, in early stages of painting, and am still getting used to the ranged gun. I get charged and smashed so haven't had a lot of chances to use the sword yet. The paint job I did is similar to an earlier post here.
There is difficulty in putting him together. I had to pin his hand, arms and head to the other parts...repeatedly. Just be aware of that before starting to allow enough time to do so.
I've used it twice so far, in early stages of painting, and am still getting used to the ranged gun. I get charged and smashed so haven't had a lot of chances to use the sword yet. The paint job I did is similar to an earlier post here.
Saturday, October 13, 2012
Rangers
I wanted to work on a squad of rangers in order to boost my ability to hit and provide a distraction for my honored opponents. My first game with them was interesting and I'm learning on how to use them.
I'll just show the progress of one of the six models in the squad. First the Sergent primed white.
The P3 Gun Corps Brown, P3 Bootstap Leather and P3 Rucksack Tan.
Then P3 Hammerfall Khaki on the leggings, P3 Midlund Flesh on the face/hands and those were drybrushed with GW Elf Flesh, GW Bronzed Flesh or Dark Flesh. Cygnar is an equal opportunity empire of the people after all.
The cape was painted P3 Traitor Green and metal bits P3 Cold Steel.
The hair was painted either GW Chaos Black, Cygnar Yellow or P3 Gun Corps Brown. Kneepads painted in P3 Cygnar Base Blue then a little P3 Cygnar Blue Highlight. The cloak was drybrushed with GW Gretchin Green.
The compass and rifle parts were painted with GW Dwarf Bronze and belt&rifle strap painted with GW Vomit Brown.
The the model was washed in GW Devlan Mud and based and flocked. The 180 degree arc was painted with P3 Cygnar Blue Highlight.
So it was a good project rather than the full ten man squads I have. In fact the next squads are Cygnar Arcane Gunners.
My cat "Squeak" approves of this model paint job.
I'll just show the progress of one of the six models in the squad. First the Sergent primed white.
The P3 Gun Corps Brown, P3 Bootstap Leather and P3 Rucksack Tan.
Then P3 Hammerfall Khaki on the leggings, P3 Midlund Flesh on the face/hands and those were drybrushed with GW Elf Flesh, GW Bronzed Flesh or Dark Flesh. Cygnar is an equal opportunity empire of the people after all.
The cape was painted P3 Traitor Green and metal bits P3 Cold Steel.
The hair was painted either GW Chaos Black, Cygnar Yellow or P3 Gun Corps Brown. Kneepads painted in P3 Cygnar Base Blue then a little P3 Cygnar Blue Highlight. The cloak was drybrushed with GW Gretchin Green.
The compass and rifle parts were painted with GW Dwarf Bronze and belt&rifle strap painted with GW Vomit Brown.
The the model was washed in GW Devlan Mud and based and flocked. The 180 degree arc was painted with P3 Cygnar Blue Highlight.
So it was a good project rather than the full ten man squads I have. In fact the next squads are Cygnar Arcane Gunners.
My cat "Squeak" approves of this model paint job.
Sunday, September 30, 2012
Terrain - GW Garden of Morr (Graveyard)
Here is my GW Garden of Morr. What is nice about this terrain feature is that is good for Warmachine/Hordes, Warhammer/40k, WW2 or any skirmish or regiment style game. For Malifaux, it also is good for the random graveyard terrain that can come up (minimum 3 inch by 3 inch).
So after I bought one and opened it up, I thought that it would look good on the tabletop but might not be enough for a table theme so...
...I bought two.
Here is sprue one of what you get. I didn't use the three gravestones in the set. More on what I used them for in a later post.
Sprue two.
Sprue three.
Here is what they look like primed black (Krylon) with a Warmachine Cygnar Ranger for scale. It spreads out quite nicely with the fence.
First the statue, with Warmachine Cygnar warcaster Hayley. I drybrushed heavily with dollar store dark grey.
Then lightly drybrushed with a dollar store middle tone grey.
Even with just these steps it's looking good.
Then I painted a few stones dark brown then drybrushed lighter brown
I then drybrushed the leaves with a dark dollar store green and discovered that it made excellent moss detail when I made a few mistakes. I then used this for all the graveyard bits. I then lightly drybrushed the leaves with a dollar store light green.The roses were painted GW Scab Red than drybrushed with GW Blood Red. The box art used a dark blue and black for the roses but I find the red pops more and adds contrast.
Here is the main gate for the graveyard. All the fences used the same technique.
Same technique as the statue. Dark Grey.
Middle Grey.
Light grey on top stones and all over.
Dark brown on some stones and ground then drybrushed with a lighter shade.
Then the leaves, moss and roses.
For the mausoleums the base was done the same as the gate. The main exception was the building itself, which was suggested by a friend. Once painted dark grey, for the drybrushing I used middle grey mixed 50/50 with dollar store dark blue. It really brought out the Gothic look to the structure.
The leaves, moss and roses followed the previously mentioned technique.
The final product I took the pictures on my front lawn area, with some Lilith Malifaux figures.
I also added some flock to bring in some greenery.
It fits very well when separated. I also added some GW Dwarven Bronze to some details as well as lightly drybrushed dollarstore antique white for the skulls and dollarstore brown for the rust.
This project was worked on for about 3-4 weeks of off and on work, which is why this post took so long.
Here is Lilith standing triumphantly at one of the gates.
Here is the terrain arranged for tight quarters or for impassable terrain and there is still pieces left over for more.
I was going to stain everything with a wood stain to add an aged effect but not sure if I'll do it to everything. The stained one is on the right.
So after I bought one and opened it up, I thought that it would look good on the tabletop but might not be enough for a table theme so...
...I bought two.
Here is sprue one of what you get. I didn't use the three gravestones in the set. More on what I used them for in a later post.
Sprue two.
Sprue three.
Here is what they look like primed black (Krylon) with a Warmachine Cygnar Ranger for scale. It spreads out quite nicely with the fence.
First the statue, with Warmachine Cygnar warcaster Hayley. I drybrushed heavily with dollar store dark grey.
Then lightly drybrushed with a dollar store middle tone grey.
Even with just these steps it's looking good.
Then I painted a few stones dark brown then drybrushed lighter brown
I then drybrushed the leaves with a dark dollar store green and discovered that it made excellent moss detail when I made a few mistakes. I then used this for all the graveyard bits. I then lightly drybrushed the leaves with a dollar store light green.The roses were painted GW Scab Red than drybrushed with GW Blood Red. The box art used a dark blue and black for the roses but I find the red pops more and adds contrast.
Here is the main gate for the graveyard. All the fences used the same technique.
Same technique as the statue. Dark Grey.
Middle Grey.
Light grey on top stones and all over.
Dark brown on some stones and ground then drybrushed with a lighter shade.
Then the leaves, moss and roses.
For the mausoleums the base was done the same as the gate. The main exception was the building itself, which was suggested by a friend. Once painted dark grey, for the drybrushing I used middle grey mixed 50/50 with dollar store dark blue. It really brought out the Gothic look to the structure.
The leaves, moss and roses followed the previously mentioned technique.
The final product I took the pictures on my front lawn area, with some Lilith Malifaux figures.
I also added some flock to bring in some greenery.
It fits very well when separated. I also added some GW Dwarven Bronze to some details as well as lightly drybrushed dollarstore antique white for the skulls and dollarstore brown for the rust.
This project was worked on for about 3-4 weeks of off and on work, which is why this post took so long.
Here is Lilith standing triumphantly at one of the gates.
Here is the terrain arranged for tight quarters or for impassable terrain and there is still pieces left over for more.
I was going to stain everything with a wood stain to add an aged effect but not sure if I'll do it to everything. The stained one is on the right.
Subscribe to:
Posts (Atom)
Batman...and Friends
"Bruce," Nightwing said while smiling, "you came. Thank you." With a deep gravel-filled voice Batman said, "It seem...
Popular Posts
-
Way waaaay back in 2015, for the second edition of Malifaux, Wyrd came out with a campaign book called "Shifting Loyalties". I mad...
-
Horizon Wars: Midnight Dark is a miniature agnostic skirmish ruleset that can be used for any small scale miniatures. The setting is near t...