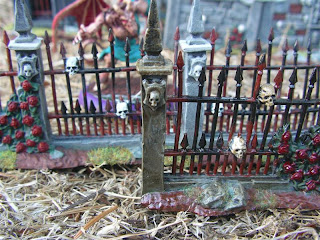
Here is my GW Garden of Morr. What is nice about this terrain feature is that is good for Warmachine/Hordes, Warhammer/40k, WW2 or any skirmish or regiment style game. For Malifaux, it also is good for the random graveyard terrain that can come up (minimum 3 inch by 3 inch).
So after I bought one and opened it up, I thought that it would look good on the tabletop but might not be enough for a table theme so...
...I bought two.
Here is sprue one of what you get. I didn't use the three gravestones in the set. More on what I used them for in a later post.
Sprue two.
Sprue three.
Here is what they look like primed black (Krylon) with a Warmachine Cygnar Ranger for scale. It spreads out quite nicely with the fence.
First the statue, with Warmachine Cygnar warcaster Hayley. I drybrushed heavily with dollar store dark grey.
Then lightly drybrushed with a dollar store middle tone grey.
Even with just these steps it's looking good.
Then I painted a few stones dark brown then drybrushed lighter brown
I then drybrushed the leaves with a dark dollar store green and discovered that it made excellent moss detail when I made a few mistakes. I then used this for all the graveyard bits. I then lightly drybrushed the leaves with a dollar store light green.The roses were painted GW Scab Red than drybrushed with GW Blood Red. The box art used a dark blue and black for the roses but I find the red pops more and adds contrast.
Here is the main gate for the graveyard. All the fences used the same technique.
Same technique as the statue. Dark Grey.
Middle Grey.
Light grey on top stones and all over.
Dark brown on some stones and ground then drybrushed with a lighter shade.
Then the leaves, moss and roses.
For the mausoleums the base was done the same as the gate. The main exception was the building itself, which was suggested by a friend. Once painted dark grey, for the drybrushing I used middle grey mixed 50/50 with dollar store dark blue. It really brought out the Gothic look to the structure.
The leaves, moss and roses followed the previously mentioned technique.
The final product I took the pictures on my front lawn area, with some Lilith Malifaux figures.
I also added some flock to bring in some greenery.
It fits very well when separated. I also added some GW Dwarven Bronze to some details as well as lightly drybrushed dollarstore antique white for the skulls and dollarstore brown for the rust.
This project was worked on for about 3-4 weeks of off and on work, which is why this post took so long.
Here is Lilith standing triumphantly at one of the gates.
Here is the terrain arranged for tight quarters or for impassable terrain and there is still pieces left over for more.
I was going to stain everything with a wood stain to add an aged effect but not sure if I'll do it to everything. The stained one is on the right.
Tabletop miniatures, role-playing games, boardgames, military history and gaming in Victoria B.C. Canada
Subscribe to:
Post Comments (Atom)
Hot Wheels Bike Terrain
I 've picked up some scatter terrain, over the last two months, for the Batman Miniature Game and Marvel Crisis Protocol at Dollorama. N...

Popular Posts
-
Over the decades, more model types have become available to hobbyists for Games Workshop Space Marines. STCs (Standard Template Constructs) ...
-
Horizon Wars: Midnight Dark is a miniature agnostic skirmish ruleset that can be used for any small scale miniatures. The setting is near t...


No comments:
Post a Comment